Laser cutting documentation blog entry
In this page, i will describe:
1. The 4 important hazards associated to the operation of laser cutting machine and their respective safety control measures (administrative/engineering control).
2. The materials that can be cut and can’t be cut using laser cutting machine.
3. The steps including pictures on the operation of universal laser cutter, that consist of:
a. Starting the compressor, turning on the laser cutter machine and fume extractor.
b. Importing a .dxf file to coreldraw and modify the lines/fill for cutting and engraving.
c. Sending the coreldraw drawing to laser cutter software and setting the laser cutter power, speed, ppi in the software.
d. Starting the job on the laser cutter machine.
e. Dos and donts when there’s flame/fire on the material being cut.
4. My learning reflection on the laser cutter activities.
1. These are the 4 important hazards and the respective safety control measures on the operation of laser cutting machine:
Hazards | Safety control measures | Pictures to support the explanation |
1. Fire will occur when laser | Fire extinguisher is provided |
|
2. When the laser cutter misoperation | Emergency stop button to cut power to the laser cutter | |
3.Dusts and smoke will occur in the operation | Fume extractor |
|
4.Heat, dusts and smoke will occur in the operation | Air assits | 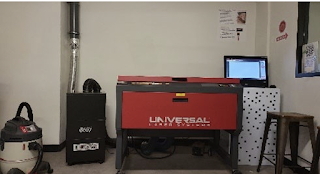 |
2. Below are the materials that can be cut/engraved using laser cutting machine in fablab.
Material | Photo of material |
1. Acrylic (up to 5mm) |
|
2. wood (up to 6mm) | 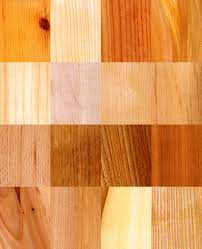 |
3. cardboard | 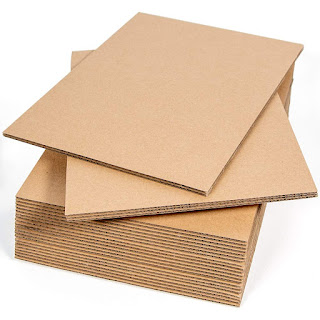 |
Below are the materials that can’t be cut/engraved using laser cutting machine in fablab.
Material | Photo of material |
1. Metal |  |
2. Polyvinyl chloride(PVC) |  |
3. Foam | 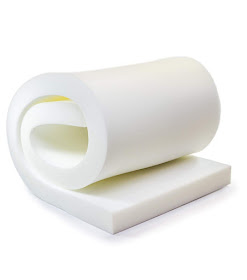 |
3. Below are the steps on the operation of universal laser cutter machine in fablab:
a. Starting the compressor, turning on the laser cutting machine and fume extractor.
Steps and description | Photos to support the description |
1. On the power of laser cutter, air assist and extractor. |
|
2. On the fume extractor | 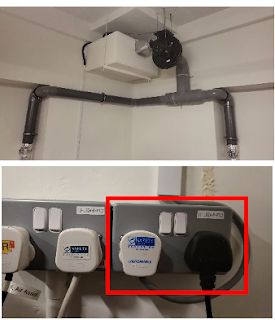 |
b. Importing a .dxf file to coreldraw and modify the lines/fill for cutting and engraving.
Steps and description | Photos to support the description |
1. 1. Select file > import > select your .dxf file and press import. | 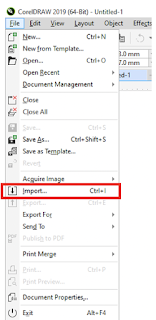 |
2. Once imported, you will need to make decision on which one to vector cut, engrave or vector engrave |

|
3. Add fill colours to your drawing for engraving |
|
4. Adjust the line-width and colour, either for vector cutting or vector engraving. | 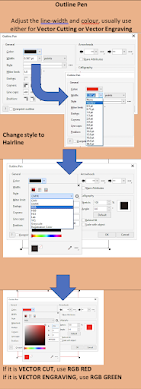 |
c. Sending the coreldraw drawing to laser cutter software and setting the laser cutter power, speed, ppi in the software.
Steps and description | Photos to support the description |
1. After settings, it can be sent for laser cutter. Click on file > print | 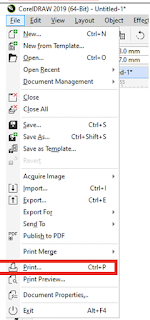 |
2. Click on cogwheel for settings | 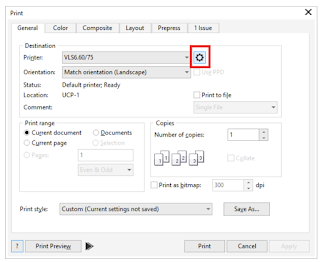 |
3. Universals material setting will appear Click on load for more material setting | 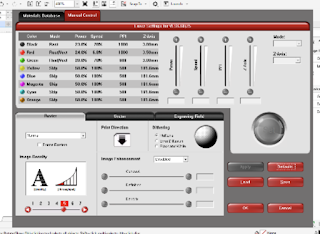 |
4. Select the material type and thickness and click open | 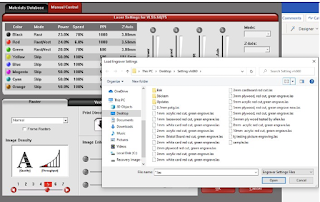 |
5. Some important details you need to check before you send it for cut! Power: describes the output power of the laser. 100% is maximum power (will cause ugly charring). For dark wood engravings or stamp engravings, you generally need high power, whereas low values are used for materials such as paper. Speed: describes the movement of the laser head. Fast speeds lead to short exposure times, slow speeds lead to long exposure times. PPI: pulses per inch, frequency may also be known as ppi or pulses per inch and is a way to control how many times the laser pulses over a given distance during the cutting process. The higher the frequency the more pulses you have and the more they will overlap resulting in a smoother cut, however the downside to this is that the higher the frequency the more heat it creates while cutting which can cause melting or charring on certain materials. Z-axis: usually set as the material height for optimal focus point |  |
| |
d. Starting the job on the laser cutter machine.
Steps and description | Photos to support the description |
1) 1.Click on the dialog |  |
2) Understanding the control panel 1. activate/ deactivate the laser cutter 2. play button to start cut/ engraving 3. pause button to pause/resume the cut/engraving 4. essential tools which will be covered next 3) Settings – to change or set settings for different material | 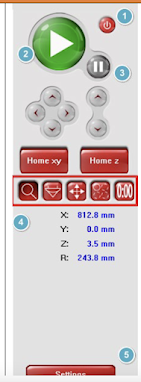 |
4) Check the empty space of the material and click on move tool to move the object to the empty space of the material. |
|
5) Click on focus tool, and a crosshair will appear.
6) Check on laser cutter as the laser head will then move to the point. |


|
7) On the ucp, click on the power Button to activate the laser cutter on the top right of the control panel. If you see the play button is green before you activate the ucp. Please deactivate and reactivate it again | |
8) Click on estimate time button and press the start button to check for the timing. Note, this does not start the laser cut, do not confuse it with the play button! |  |
9) If all is good, a. shut the lid gently b. press either the play button on UCP or the physical button on the laser cutter |
|
10) once extraction is done. Gently lift up the lid, wait for 1 minutes before removing your material. | |
e. Dos and donts when there’s flame/fire on the material being cut.
Dos and donts | Photos to support the description |
1. If the fire is negligible, try putting it out by blowing it off |
|
2. Any flame MUST DIE OUT within 1-2 seconds. If the flame persists, lift the lid of the laser cutter, and stop the cutting operation. | |
3. If the fire is unable to blow off, stop the laser cutter and remove material from the laser cutter place it on the floor and step on it to put out the fire | |
4. If the fire is uncontrollable, go to the closest fire extinguisher and put it out. Get people’s attention by shouting for help. | 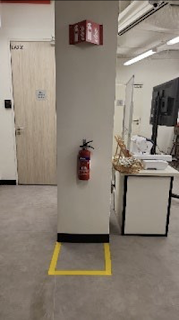
|
4. Below is my learning reflection on the laser cutter activities.
For this competency test, I was nervous as I had never seen the laser cutter before. However, I had looked through the learning package on Brightspace which guided me on how to operate the laser cutter safely. Before the test, Mr. Mark briefed us again to ensure we are clear with the activities today. In the test, it went quite smoothly since I had created my own SOP with the reference from Brightspace. Nevertheless, there still a lot of improvements that I could make. For instance, I should be more relax without pressuring too much on myself. I should be more confident and believe in myself that I can do it. Thus, I should enhance more on my self-confidence to be more calm in the activity.


Comments
Post a Comment